„Microsoft Edge“ yra „Microsoft“ sukurta interneto naršyklė. Jis buvo įtrauktas į „Windows“ kaip numatytoji naršyklė, pakeičianti „Internet Explorer“. Jis yra lengvesnis ir turi daugiau funkcijų, palyginti su „Internet Explorer“, pvz., Integracija su „Cortana“ ir užrašų skaitymas ir kt.
Neseniai, atnaujinę „Windows 10“ operacinę sistemą, daugelis vartotojų pranešė, kad „Edge“ nepavyko paleisti, ir nuolat uždarė save be raginimų. Šiam klausimui gali būti daug priežasčių. Pradėkite sprendimus nuo viršaus ir eikite žemyn.
Pastaba: krašto gedimas po kritimo kūrėjų atnaujinimo (1709) yra skirtas straipsnio pabaigoje.
1 sprendimas: išvalykite kompiuterio paleidimą
Jei pirmą kartą kyla problemų su „Microsoft Edge“, rekomenduojama iš naujo paleisti kompiuterį. Jei tai nepagerins, galime išbandyti „Clean Booting“. Šis įkrovimas leidžia jūsų kompiuteriui įsijungti naudojant minimalų tvarkyklių ir programų rinkinį. Tik pagrindinės yra įjungtos, o visos kitos paslaugos yra išjungtos.
- Paspauskite „ Windows + R“, kad paleistumėte programą „Vykdyti“. Dialogo lange įveskite „ msconfig “ ir paspauskite Enter.

- Eikite į „Services“ skirtuką, esantį ekrano viršuje. Pažymėkite eilutę „ Slėpti visas„ Microsoft “paslaugas “. Kai spustelėsite tai, visos susijusios „Microsoft“ paslaugos bus išjungtos, paliekant visas trečiųjų šalių paslaugas.
- Dabar spustelėkite mygtuką „ Išjungti viską “, esantį beveik apačioje, kairėje lango pusėje. Dabar visos trečiųjų šalių paslaugos bus išjungtos.
- Spustelėkite Taikyti, kad išsaugotumėte pakeitimus ir išeitumėte.

- Dabar eikite į skirtuką „Startup“ ir spustelėkite parinktį „ Open Task Manager “. Būsite nukreipti į užduočių tvarkyklę, kur bus išvardytos visos programos / paslaugos, kurios veikia paleidus kompiuterį.

- Pažymėkite kiekvieną paslaugą po vieną ir lango apačioje, dešinėje, spustelėkite „ Išjungti “.

- Dabar paleiskite kompiuterį iš naujo ir patikrinkite, ar „Edge“ sėkmingai paleista. Jei taip, tai reiškia, kad problemą sukėlė išorinė programa. Ieškokite per įdiegtas programas ir nustatykite, kuri programa sukelia jūsų problemų.
2 sprendimas: „Trusteer Rapport“ išjungimas
„Trusteer Rapport“ yra saugos programinė įranga, skirta apsaugoti konfidencialius duomenis nuo kenkėjiškų programų ir sukčiavimo. Jame įdiegti intensyvūs kovos su sukčiavimu metodai ir jis apsaugo vartotojus nuo beveik visų rūšių išpuolių. Prieš įvesdami savo įgaliojimus, jis nedelsdamas įspėja apie įtartiną veiklą ir visada užtikrina, kad svetainė yra saugi.
Panašu, kad po „Windows“ atnaujinimo „Trusteer Rapport“ pradėjo konfliktuoti su „Microsoft Edge“. „Ankstyvos naršyklės apsaugos“ politika kažkaip prieštarauja „Edge“ ir neleidžia jai pradėti. Mes galime pakeisti politiką arba išjungti „Trusteer Rapport“ ir patikrinti, ar „Edge“ veikia taip, kaip tikėtasi.
- Paspauskite „ Windows + S“, kad paleistumėte pradžios meniu paieškos juostą, ir įveskite „ Patikėtojas “. Pasirinkite parinktį „ Trusteer Endpoint Protection Console “, kuri bus grąžinta, ir atidarykite ją.
- Paleidus konsolę, spustelėkite žalią rodyklę , esančią apatinėje dešinėje ekrano pusėje. Būsite nukreipti į kitą puslapį.

- Dabar spustelėkite „ Redaguoti politiką “, esančią viršutinėje kairėje ekrano pusėje esančiame saugos politikos skirtuke.

- Dabar jums bus suteikta captcha, kad įsitikintumėte, jog esate žmogus. Įveskite raides, kaip nurodyta, ir paspauskite Gerai, jei norite tęsti.
- Atsidarys naujas langas, kurį sudaro visos programos saugos strategijos. Naršykite po juos, kol rasite įrašą „ Ankstyvosios naršyklės apsauga “. Spustelėkite išskleidžiamąjį meniu ir iš galimų parinkčių sąrašo pasirinkite „ Niekada “.

- Norėdami įgyvendinti visus pakeitimus ir išeiti, paspauskite „Išsaugoti“. Iš naujo paleiskite kompiuterį ir patikrinkite, ar „Edge“ veikia taip, kaip tikėtasi.
Pastaba: galite pabandyti pašalinti „Trusteer Rapport“, jei politikos pakeitimas neveikia. Prieš pradėdami toliau nurodytus sprendimus, primygtinai rekomenduojame ištrynus „Trusteer“ patikrinti savo pranašumus.
3 sprendimas: paleiskite sistemos failų tikrintuvą
Sistemos failų tikrinimo priemonė (SFC) yra „Microsoft Windows“ esanti priemonė, leidžianti vartotojams nuskaityti kompiuterius, ar jų operacinėje sistemoje nėra sugadintų failų. Šis įrankis yra „Microsoft Windows“ nuo „Windows 98“. Tai labai naudinga priemonė diagnozuojant problemą ir patikrinant, ar bet kokia problema kyla dėl sugadintų „Windows“ failų.
Galime pabandyti paleisti SFC ir sužinoti, ar jūsų problema bus išspręsta. Paleisdami SFC, gausite vieną iš trijų atsakymų.
- „Windows“ nerado vientisumo pažeidimų
- „Windows“ išteklių apsauga rado sugadintus failus ir juos pataisė
- „Windows“ išteklių apsauga rado sugadintus failus, tačiau kai kurių (arba visų) ištaisyti nepavyko
- Paspauskite „ Windows + R“, kad paleistumėte programą „Vykdyti“. Dialogo lange įveskite „ taskmgr “ ir paspauskite Enter, kad paleistumėte kompiuterio užduočių tvarkyklę.
- Dabar lango viršuje kairėje pusėje spustelėkite parinktį Failas ir galimų parinkčių sąraše pasirinkite „ Vykdyti naują užduotį “.

- Dabar dialogo lange įveskite „ PowerShell “ ir pažymėkite po juo esančią parinktį „ Sukurti šią užduotį su administratoriaus teisėmis “.

- Patekę į „Windows Powershell“ įveskite „ sfc / scannow “ ir paspauskite Enter . Šis procesas gali užtrukti, nes kompiuteris tikrina visus „Windows“ failus ir tikrina, ar nėra sugadintų fazių.

- Jei susiduriate su klaida, kai „Windows“ teigia radusi klaidą, bet negalinti jos ištaisyti, turėtumėte „ PowerShell “ įvesti „ DISM / Online / Cleanup-Image / RestoreHealth “. Tai atsisiųs sugadintus failus iš „Windows“ naujinimo serverių ir pakeis sugadintus failus. Atkreipkite dėmesį, kad šis procesas taip pat gali užtrukti šiek tiek laiko, atsižvelgiant į jūsų interneto ryšį. Negalima atšaukti bet kuriame etape ir leisti jam veikti.
Jei aptikta klaida ir ji buvo pašalinta naudojant aukščiau nurodytus metodus, iš naujo paleiskite kompiuterį ir patikrinkite, ar užduočių juosta pradėjo veikti normaliai.
4 sprendimas: iš naujo įdiekite „Edge“
If the repairing of Microsoft Edge doesn’t work, we can try reinstalling it. Since Edge is installed by default on Windows 10, it cannot be uninstalled using the conventional method we use for other applications. We have to navigate to the file location of Edge, take ownership, and deleting the folders. Then we can install Edge again using Powershell.
- Press Windows + R to launch the Run application. Type “C:\Users\%username%\AppData\Local\Packages\Microsoft.MicrosoftEdge_8wekyb3d8bbwe” in the dialogue box and press Enter to navigate to the file location.
- Once in the file location, navigate back to Packages and takeownership of the folder we just accessed. Follow the steps on how to take ownership of folders using this guide.

- Once you have ownership, you can easily delete all the folders. This will uninstall Microsoft Edge.

- Now press Windows + S to launch the search menu and type “Powershell” in the dialogue box. Right click on the first result and select Run as administrator.
- Now type the following command in the console and press Enter. The process might take a while as this command tries to install all the default applications which are present when you install a new version of Windows 10. Be patient and let the process complete.
Get-AppXPackage -AllUsers -Name Microsoft.MicrosoftEdge | Foreach {Add-AppxPackage -DisableDevelopmentMode -Register "$($_.InstallLocation)\AppXManifest.xml" -Verbose}
- Now restart your computer and check if Microsoft Edge works.
Solution 4: Changing the Group Policy (Post 1709 Update)
The solutions listed below are written for post-1709 (Creators Fall Update) which caused a lot of problems for edge users.
Another aspect that seems to conflict with the Edge browser was the GPO settings regarding “Allow extensions”. It seems that after the update, this setting is not configured properly and causes Edge to crash randomly. We can try editing the policy and check if this fixes anything.
- Press Windows + R to launch the Run application. Type “gpedit.msc” in the dialogue box and press Enter.
- Once in the Group Policy Editor, navigate to the following path:
Computer Configuration > Administrative Templates > Windows Components > Microsoft Edge
- Look for the policy named “Allow Extensions” present at the right side of the window. Double-click it to change its settings.

- Change the policy setting to “Not Configured”. Press Ok to save changes and restart your computer. Check if Edge started working as expected.

Solution 5: Editing the Registry (Post 1709 Update)
Another workaround for the same problem (Allow extensions) is to edit the registry. This solution is recommended for users who don’t have GPE installed on their machines. This will perform the same functionality as the previous solution. However, you can still give it a shot of the previous one didn’t work.
- Press Windows + R to launch the Run application. Type “regedit” in the dialogue box and press Enter.
- Once in the registry editor, navigate to the following file path:
HKEY_LOCAL_MACHINE\SOFTWARE\Policies\Microsoft\MicrosoftEdge\Extensions
- At the right side of the screen, you will see an entry “Extensions Enabled” with the DWORD value most probably “00000000”. Double-click it and change its value to “1”.
You can even delete the registry value after backing it up by right-clicking the “MicrosoftEdge” folder (at the navigation panel at the left side of the window) and selecting “Export”. This way you can always revert changes if things don’t go as expected.

- Restart your computer after applying the changes and check if this solves the problem at hand.
Solution 6: Adding a Registry Key using Command Prompt (Elevated) (Post 1709 Update)
If all the above solutions don’t work, we can try adding a key using an elevated command prompt into your registry. Do note that this process requires administrator account so don’t try executing it in a limited one. We will add a registry key to users in this method. Make sure to backup or create a restore point before attempting this method. If things don’t work out, you can easily restore the previously saved session of your OS.
- Press Windows + S to launch the Search bar. Type “command prompt” in the dialogue box, right-click on the result and select “Run as administrator”.
- Once at the command prompt, execute the following instruction:
reg add “HKCU\Software\Microsoft\Internet Explorer\Spartan” /v RAC_LaunchFlags /t REG_DWORD /d 1 /f

- Restart your computer and check if the problem got solved.
Solution 7: Resetting Edge Settings
Another thing to try before we move on to more technical and tedious solutions is resetting Edge settings completely. There are numerous instances where because of some minor problems or technicalities, Edge doesn’t open as expected.
The settings are mostly internal and get initialized automatically. These settings may sometimes have some bad configurations which might be conflicting internally. You can easily reset Edge settings using the steps below:
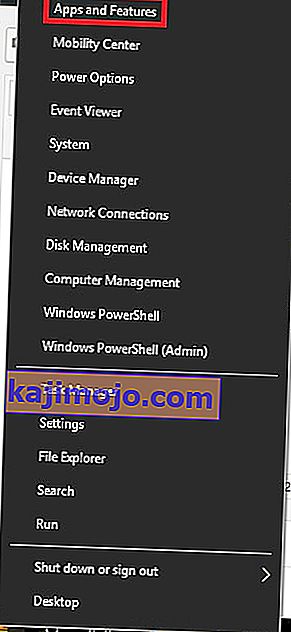
- Right-click on the Start menu and then select Apps and Features.
- Now, click on Microsoft Edge and then select Advanced options.
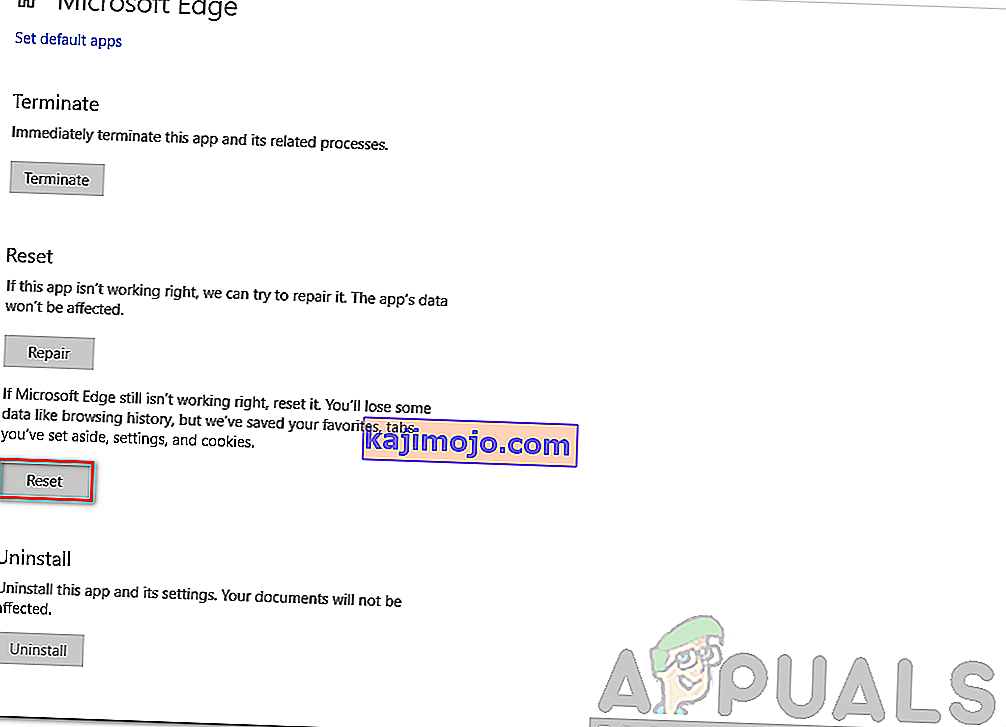
- Click on Reset.
- Restart your computer completely and then check if the issue is resolved for good.


Solution 8: Power-cycling your Computer
Another thing to try is power cycling your computer completely. Power cycling is an act in which you completely restart your computer by removing the power cord as well. This will remove all the temporary settings that your operating system has stored and will reinitialize them. If Edge is not opening because of this, it will be fixed.

Save all your work and shut down your computer. Now, take out the power cord from your PC or the battery from your laptop. Press and hold the power button for about 15 seconds before starting your computer again and checking if the issue is resolved and you can use Edge properly.
Solution 9: Creating a new User Account
Another thing which we can try is creating a new user account in your computer. Every Microsoft service is connected to the account you are accessing it with. Its configurations and preferences are bound to the local account. Here, if you have issues with your user account, it can cause Edge not to start as expected.
After creating a new user account, restart your computer and log into it and check if Edge works properly.
Solution 10: Reinstall Windows
If none of the above methods work, we can consider reinstalling Windows completely. Edge is pre-installed in Windows and when you reinstall it, everything gets refreshed and gets reinitialized as well. This will erase all your System drive files so make sure you backup all your preferences and other data before proceeding.
After repair installing Windows, log into your new account and enjoy Edge. You can restore your data back after you verify that Edge is working as expected.