„Nord VPN“ yra vienas iš seniausių žaidėjų VPN pasaulyje, o jo „Windows“ programa laikoma viena geriausių kompiuterių pasaulyje. „Nord VPN“ yra labai įvairus, jei kalbama apie funkcionalumą ir lankstumą. Be kelių platformų palaikymo, ji taip pat turi skirtingus serverius, esančius skirtingose šalyse, kad galėtumėte pasirinkti.

Nepaisant to, kad programa gana ilgai buvo rinkoje, vartotojai praneša, kad negali prisijungti prie „Nord VPN“. Arba nustoja prisijungti po galimo atnaujinimo, arba užklausa DNS serveriams pateikia atsakymą „Baigtasis laikas“.
Kodėl „Nord VPN“ nesusijungia?
Kadangi VPT naudoja visą kompiuterio sistemos interneto architektūrą, yra keletas priežasčių, kodėl „Nord VPN“ gali nepavykti tinkamai prisijungti. Kai kurie iš jų yra išvardyti žemiau.
- „IPv6“: Akivaizdu, kad „Nord VPN“ nepalaiko IPv6 protokolo jokiuose savo ryšiuose. Taigi, jei tai įgalinta, gali nepavykti prisijungti.
- Trečiųjų šalių programos: žinoma, kad trečiųjų šalių programos prieštarauja programinės įrangos sistemai ir konkuruoja dėl išteklių; todėl jis netinkamai prisijungia.
- Tinklo adapteris: Kadangi „Nord“ ryšiui su internetu naudoja atskirą tinklo adapterį, gali būti, kad tinklo adapteris neveikia tinkamai ir turite jį paleisti iš naujo.
- Klaida tinkle: kartais tinklo konfigūracijos jūsų kompiuteryje gali būti klaidos būsenos, dėl kurios apskritai nėra ryšio. Šiuo atveju galime pabandyti atnaujinti visus kintamuosius.
Prieš pradėdami nuo sprendimų, turite įsitikinti, kad jūsų internetas iš tikrųjų veikia . Jei jūsų internetas neveikia tinkamai, „Nord“ negalės užmegzti tinkamo ryšio ir suteikti jums prieigą prie tunelinio tinklo.
Įsitikinkite, kad naudojatės privačiu tinklu (ne mokykloje, darbe ar viešose vietose, pvz., Ligoninėse) ir nėra įgaliotinių. Dar kartą patikrinę, ar jūsų internetas veikia gerai, tęskite.
1 sprendimas: IPv6 išjungimas
IPv6 („Internet Version Protocol 6“) yra naujausia IP versija kompiuterio tinklo architektūroje. Pagal numatytuosius nustatymus mes vis dar naudojame IPv4 ir vis dar neperėjome prie IPv6 visam laikui. Tačiau ten gali būti keletas iš jūsų, kurie pradėjo naudoti IPv6 interneto ryšiui. Panašu, kad IPv6 tinkamai neveikia su „Nord VPN“. Taigi mes jį išjungsime ir patikrinsime dar kartą.
- Dešiniuoju pelės mygtuku spustelėkite tinklo piktogramą, esančią užduočių juostoje, ir pasirinkite Atidaryti tinklo ir interneto nustatymus . Dabar nustatymuose spustelėkite parinktį Keisti adapterio parinktis .

- Patekę į adapterio nustatymus, dešiniuoju pelės mygtuku spustelėkite naudojamą adapterį ir pasirinkite Ypatybės .
- Kartą adapterio properties, nuimkite prie IPv6 parinktį ir įsitikinkite, kad IPv4 yra įjungtas. Išsaugokite pakeitimus ir išeikite. Dabar paleiskite kompiuterį iš naujo ir patikrinkite, ar klaida išspręsta ir ar galite prisijungti prie „Nord VPN“.

2 sprendimas: trečiųjų šalių programų tikrinimas
Yra daugybė kitų programų ir programų, kurios, atrodo, prieštarauja „Nord VPN“ veikiant. Jei prie šaltinio bando prisijungti daugiau nei viena programa, bus varžybų sąlyga ir jos neveiks taip, kaip tikėtasi.

Turėtumėte iškelti užduočių tvarkyklę („Windows + R“ ir „taskmgr“) ir patikrinti visas fone veikiančias programas. Viena tokių programų, kuri, kaip žinoma, kėlė problemų, buvo „ Glasswire Elite“ . Bandydami prisijungti prie „Nord VPN“, būtinai pašalinkite arba išjunkite.
Pastaba: Taip pat galite pabandyti išvalyti kompiuterio įkrovą. Tai išjungs visas išorines trečiųjų šalių programas ir paleis tik būtinas. Dabar galite pabandyti užmegzti ryšį. Jei jums sekasi, tai reiškia, kad problemą sukėlė programa. Galite grįžti įgalinę kiekvieną programą ir dar kartą patikrinę.
3 sprendimas: pakeisti serverio vietą
„Nord VPN“ suteikia vartotojams galimybę pasirinkti savo serverio vietą. Šie serveriai yra išsibarstę po visą pasaulį ir suteikia ryšį pagal jų geografinę vietą, ty tikimasi, kad arčiau jūsų esantis serveris bus greitesnis. Pabandysime pakeisti serverio vietą, prie kurios bandote prisijungti, ir išsiaiškinsime, ar tai išsprendžia neprisijungimo problemą.
- Paleiskite „Nord VPN“ ir spustelėkite antraštę Serveriai , esančią programos viršuje.

- Dabar pasirinkite kitą serverį nei anksčiau, o pasirinkę dar kartą pabandykite suaktyvinti VPN. Jei taip pat elgiatės, pabandykite pasirinkti kitą serverį ir išbandyti tinklą kitoje svetainėje.
4 sprendimas: iš naujo paleiskite tinklą / TAP adapterį
„Nord VPN“ sukuria virtualų tinklo adapterį jūsų kompiuteryje, kurį gali naudoti informacijos perdavimui. Tai veikia kaip tiltas, kuriame „Nord VPN“ keičia parametrus, kad galėtų užmegzti ir palaikyti VPN ryšį. Kartais tai būna klaidos būsena, dėl kurios jūs negalite prisijungti prie savo VPN serverio. Tinkamai paleisime adapterį, kuris užtikrins, kad visos jo konfigūracijos būtų atnaujintos.
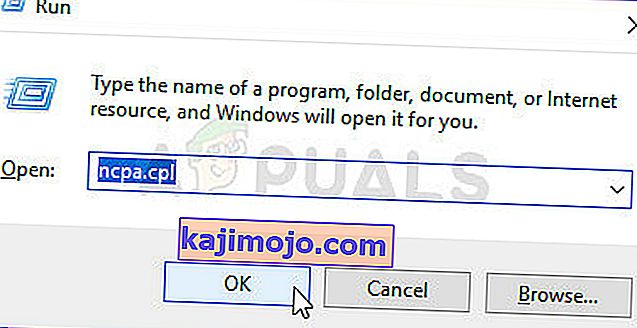
- Paspauskite „Windows + R“, įveskite „ ncpa. cpl “dialogo lange ir paspauskite Enter.
- Visi tinklo adapteriai bus pateikti prieš jus. Pasirinkite TAP adapterį, dešiniuoju pelės mygtuku spustelėkite jį ir pasirinkite Išjungti .

- Išjungę palaukite minutę. Tada dar kartą spustelėkite jį dešiniuoju pelės mygtuku ir pasirinkite Įgalinti . Dabar pabandykite prijungti „Nord VPN“ ir pažiūrėkite, ar tai pavyks.
5 sprendimas: praplaukite tinklo kaminą
Yra begalė pavyzdžių, kai praplovus (atnaujinant) tinklo kaminą kompiuteryje, išsprendžiamos įvairios su VPN susijusios problemos (įskaitant „Nord“). Šis procesas pašalins jūsų DNS ir IP parametrus ir įsitikins, kad nėra netinkamų parametrų, kurie gali prieštarauti programai.
- Paspauskite „Windows + S“, dialogo lange įveskite „komandų eilutė“, dešiniuoju pelės mygtuku spustelėkite programą ir pasirinkite Vykdyti kaip administratorius .
- Patekę į padidintą komandų eilutę, vykdykite šias komandas po vieną ir po kiekvienos komandos po klavišo Enter:
ipconfig / release ipconfig / flushdns ipconfig / atnaujinti „Netsh Winsock Reset Netsh“ sąsają „IPv4 Reset“ „Netsh“ sąsaja „IPv6 Reset“ „Netsh Winsock Reset“ katalogas „Netsh int“ „IPv4“ atstatyti „reset“.

- Now close the command prompt and try launching Nord VPN again. Check if you can connect with it properly.
Solution 6: Reinstalling Nord VPN (along with the TAP adapter)
If all the above methods don’t work, you need to make sure that your Nord installation is proper and there is nothing wrong with the installation files. The TAP adapter will also be reinstalled in the process because Nord VPN manages the adapter and it is only for its use. Make sure that you are logged in as an administrator. If reinstalling doesn’t work, make sure that your credentials are correct which you are entering the services have not expired.
- Press Windows + R, type “appwiz.cpl” in the dialogue box and press Enter.
- Once in the application manager, search for the entry Nord VPN from the list, right-click on it and select Uninstall.

- Now restart your computer and download the application again from Nord VPN’s official website. Now after entering your credentials, try connecting again and check if you can establish the VPN connection correctly.
Solution 7: Using an Alternative VPN Service
There are numerous VPN clients out there in the Windows market. However, we recommend or readers to try CyberGhost. This VPN service is as simple as it gets and also provides you with servers located at different countries. It even has separate VPN servers for streaming Netflix and BBC with ease. Follow the steps below to download the application and get your connection secure in no time.
- Download CyberGhost from (here).

- After downloading the VPN, install it on your computer. You might be asked for proper permissions. Make sure that you are logged in as an administrator and press Yes to all the permissions asked.
- After CyberGhost is installed on your computer, launch it. Here you will see a list of different servers available along with the distance from your actual location (more distance means slower internet).

- After selecting the server, click on the power button present at the right-hand side of the application. You can also select dedicated servers for torrenting and streaming (present at the left navigation pane).
Solution 8: Disable Firewall
In some cases, the default Windows Firewall might be preventing the application from working properly. Therefore, in this step, we will first be allowing it through the Firewall and make sure that it isn’t blocked by the Firewall and then we will also make sure that Windows Defender has it added as an exception. For that:
- Press “Windows” + “R” to launch the Run prompt.
- Type in “ControlPanel” and press “Enter” to launch the classical control panel interface.

- Click on the “View by:” button, select “Large Icons” and then click on the Windows Defender Firewall option.
- Select the “Allow an app orfeature through the Firewall” button on the left pane and then click on the “Change Settings” button and accept the prompt.
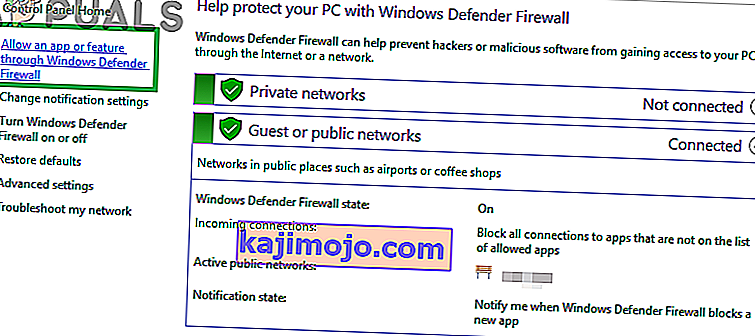
- From here, make sure that you check both the “Public” and the “Private” options for Nord VPN and its related applications/drivers.
- Save your changes and exit out of the window.
- After that, press “Windows” + “I” to launch the settings and click on the “Updateand Security” option.
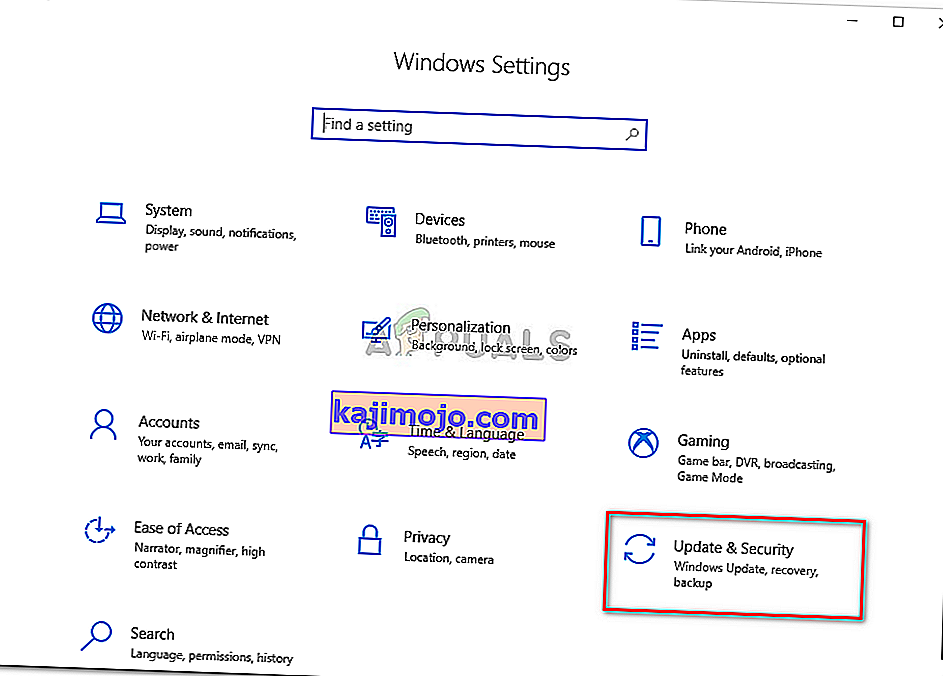
- From the left pane, click on the “Windows Security” button and then click on the “Virus and Threat Protection” button.
- Select the “Manage Settings” button under the Virus and Threat Protection Settings heading.
- Scroll down and click on the “Add or Remove Exclusions” button in the next window.
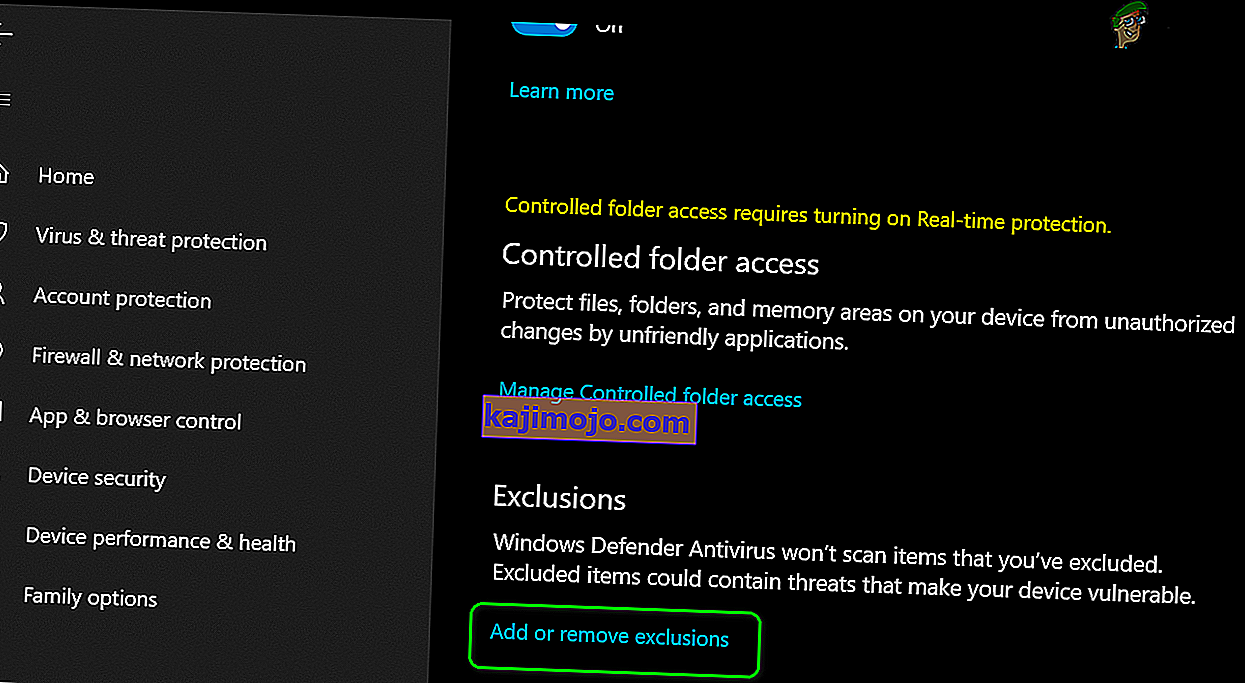
- Click on the “Add an Exclusion” option and select “Folder’ from the File type.
- Make sure to specify the Nord VPN folder and exit out of this window after saving your changes
- Check and see if doing so has fixed the issue with Nord VPN not connecting.


Solution 9: Change NordVPN Protocol
It is possible that Nord VPN might be running into issues while trying to connect to its servers due to the protocol configuration in its settings. If one type of protocol isn’t working for you, it is always recommended to try and switch to the other protocol to make sure that the issue isn’t tied to the wrong selection of the protocol type automatically or manually. For that:
- Launch NordVPN and make sure to disconnect from any currently active sessions.
- Click on the “Gear” icon on the top right corner and go into the settings.
- Click on the “Advanced” option from the left-hand side menu.
- Click on the “Protocol” dropdown and check on “TCP”.
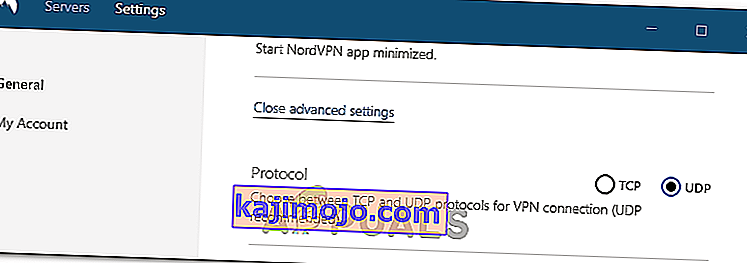
- This should change your protocol from TCP to UDP.
- Check to see if doing so fixes the issue for your computer.
- To Verify that none of the protocols work, make sure to repeat the steps and select “UDP” instead of TCP and then check again.
- If none of the selected protocols are able to make a connection with the server, move on to the other fixes.

Solution 10: Changing DNS Server Configuration
DNS Servers are used by the computer to establish a stable and secure internet connection with other sites on the internet, however, if the computer is unable to detect the DNS settings properly, or if the selected DNS server is facing outage, Nord VPN might not connect properly. Therefore, in this step, we will be changing the DNS configuration to ensure that DNS isn’t an issue. For that:
- Press “Windows” + “R” to launch the Run prompt.
- Type in “ncpa.cpl” and press “Enter” on the keyboard to launch the network configuration panel.
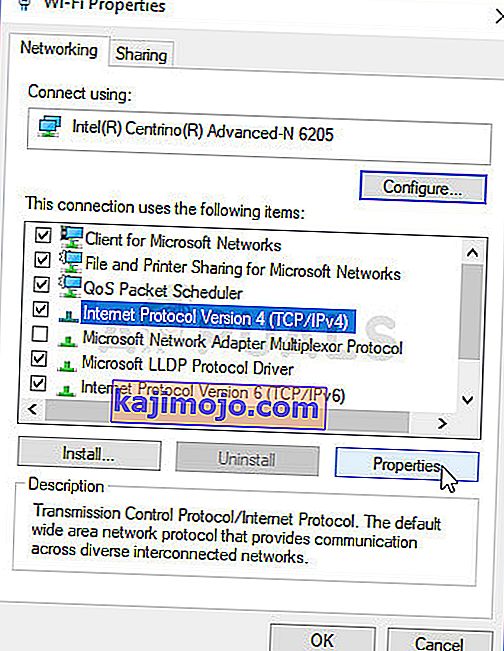
- Right-click on your internet connection and select the “Properties” option.
- Double click on the “Internet Protocol Version4 (TCP/IPV4)” option and check on the “Use the following DNS addresses” button.
- At first, type in “8.8.8.8” and “8.8.4.4” in the primary and the secondary DNS addresses field respectively and click on “OK”. After that, check to see if NordVPN is connecting, if it isn’t, try to use “103.86.96.100” and “103.86.99.100” in the primary and the secondary fields respectively.
- Check to see if you are able to make a connection by selecting those DNS servers.


Solution 11: Opening Ports
For some people, the issue might arise if the ports that NordVPN uses to communicate with its servers are being blocked by your router. For security reasons most routers often block ports used by VPN/Network Tools to prevent any alterations to your connections and if that is the case, we will have to open the ports by logging in to the router’s control panel. For that:
- Press “Windows” + “R” to launch the Run prompt and type in “cmd” and then press “Ctrl” + “Shift’ + “Enter” keys on your keyboard to provide admin permissions.

- Type in the following command in the command prompt to list the IP information.
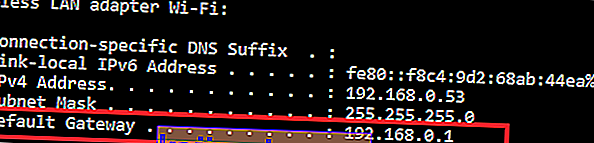
ipconfig /all
- The computer will list all the information of the network adapters connected to your computer.
- Under the default gateway option, after the mac address, there should be an IP address that should look something like “192.168.x.x”.
- Copy this IP address and launch your browser.
- Paste the IP address within a new tab on the browser and press “Enter” to navigate to the browser’s login page.
- Once on the login page, log into the control panel with your credentials, both of which, i.e the username and password should be written on the back of your internet router. If not, then the username should be admin and the password should be the Wifi password that you use to connect your devices.
- After logging into the Control panel, look around for a “NAT” or “Port” option that allows you to forward ports.
- Type in “500” and select “UDP” from the list.
- Click on “Save” to forward the 500 UDP port and exit out of the control panel after the change has been made.
- Try connecting with Nord VPN and check to see if the issue persists.


Solution 12: Use Hotspot
Mostly, this error can be fixed simply by employing your mobile’s hotspot connection instead of the Wifi or the Wired connection that you are already using on your computer. This does seem an inconvenience for Data conscious people but it seems to be the only way some people are able to connect through Nord VPN as some routers block it completely.
Note: In addition to this, you can try to change the firmware on your router to avoid any permanent blocks put from the router or to eliminate any bugs with the connection.