„ Užmegzti saugų ryšį “ yra pranešimas, rodomas apatiniame kairiajame „Google Chrome“ naršyklės lango kampe, kai bandote apsilankyti svetainėje. Jis rodomas lankantis svetainėse, kuriose naudojamas HTTPS protokolas. Tokių svetainių lankymas reiškia, kad reikia užmegzti saugų, užšifruotą ryšį.

Tačiau „Google Chrome“ vartotojai tvirtina, kad visoms svetainėms užmegzti šį ryšį užtrunka per ilgai, ypač palyginti su „Edge“ ar „Firefox“ naršyklėmis. Yra nemažai skirtingų metodų, kuriais žmonės sėkmingai išsprendė šią problemą, ir mes nusprendėme juos išvardyti šiame straipsnyje. Patikrinkite juos žemiau!
Kas sukelia „Google Chrome“ saugaus ryšio sukūrimo problemą?
Yra nemažai skirtingų šios problemos priežasčių, todėl norėdami tiksliai nustatyti teisingą scenarijaus priežastį, turėtumėte perskaityti žemiau pateiktą sąrašą. Tai susiaurins trikčių šalinimo metodus, kuriuos galite naudoti! Patikrinkite tai žemiau!
- Kriptografijos tarnyba sugedo - ši paslauga yra atsakinga už TLS rankų paspaudimų, kurie naudojami saugiems ryšiams tarp klientų ir serverių užmegzti, išsprendimą. Paleidus šią paslaugą problema turėtų būti išspręsta.
- Įtartini priedai - jei prie „Chrome“ naršyklės pridėjote naujų plėtinių ir papildinių, vienas jų gali sukelti ryšio problemų ir pailginti saugiam ryšiui užmegzti reikalingą laiką. Apsvarstykite galimybę juos pašalinti iš „Google Chrome“.
- Antivirusinės patikros - daugumoje antivirusinių programų yra HTTP nuskaitymo funkcija, kuri nuskaito bandomus užmegzti ryšius. Tai pailgins prisijungimui reikalingą laiką, todėl turėtumėte apsvarstyti galimybę jį išjungti, kad viskas paspartėtų.
- TLS 1.3 - Jei naudojate TLS 1.3 „Google Chrome“ naršyklėje, tam tikros svetainės gali būti nesuderinamos, todėl apsvarstykite galimybę jį išjungti kol kas.
1 sprendimas: naudokite šiuos komandų rinkinius
Šis metodas yra gana populiarus dėl savo paprastumo ir daugybė žmonių jį naudoja, kad išspręstų daugumą dalykų, susijusių su nagrinėjama problema. Juokingiausia, kad tai veikia ir vartotojai pakomentavo sakydami, kad tai vienintelis žingsnis, kurio reikėjo problemai išspręsti. Išbandykite dabar, peržiūrėdami 2 sprendimą iš mūsų „ Fix: Err_Connection_Closed“ straipsnio. Įsitikinkite, kad atlikote tik pirmąjį veiksmų rinkinį naudodami komandas komandų eilutėje!
Pabandykite atidaryti „Google Chrome“ ir patikrinkite, ar „Saugaus ryšio pranešimo nustatymas“ vis dar guli per ilgai!
2 sprendimas: atlikite tinklo atstatymą
Tinklo nustatymas iš naujo yra dar vienas paprastas šios problemos sprendimo būdas. Tai pasiteisino daugeliui vartotojų ir jūs neturite ką naudoti, jei tai išbandysite. Atlikite toliau nurodytus veiksmus ir patikrinkite, ar aplankant „Google Chrome“ svetainę pranešimas „Užmegzti saugų ryšį“ vis dar užtrunka ilgai!
- Atidarykite „ Run“ įrankį naudodami klaviatūros „ Windows Key + R“ kombinaciją (vienu metu paspauskite šiuos klavišus. Naujai atidarytame laukelyje be kabučių įveskite „ ms-settings: “ ir spustelėkite Gerai, kad atidarytumėte nustatymų įrankį.
- Kitas būdas būtų atidaryti nustatymų įrankį kompiuteryje spustelėjus meniu Pradėti ir apačioje kairėje spustelėjus krumpliaračio piktogramą.

- Taip pat tam pačiam efektui galite naudoti „ Windows“ klavišą + I. Spustelėkite, kad atidarytumėte skiltį „ Tinklas ir internetas“ ir liktumėte kairėje lango pusėje esančiame skirtuke „ Būsena “.
- Slinkite žemyn, kol pasieksite mėlyną tinklo atstatymo mygtuką. Spustelėkite jį ir vykdykite instrukcijas, kurios pasirodys ekrane, ir įsitikinkite, kad laikotės visko.

- Patikrinkite, ar ta pati problema išlieka!


3 sprendimas: iš naujo paleiskite kriptografines paslaugas ir DNS klientą tarnybose
Failų bendrinimas, kaip ir bet kuri kita „Windows 10“ funkcija, priklauso nuo tam tikrų paslaugų tinkamo veikimo. Tokiu atveju paslaugos vadinamos funkcijų atradimo teikėjo prieglobos ir funkcijų paieškos šaltinių publikacijomis. Reikia pradėti teikti šias paslaugas ir nuolat veikti. Norėdami tai pasiekti savo kompiuteryje, atlikite toliau nurodytus veiksmus!
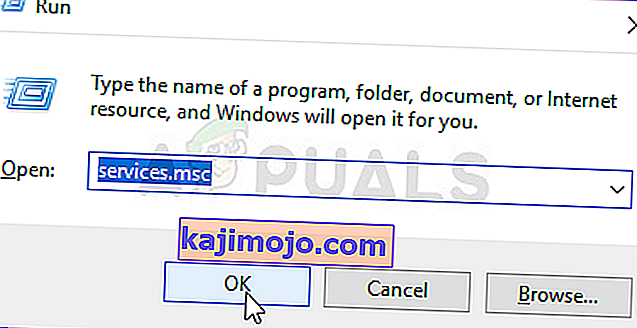
- Atidarykite „ Run“ įrankį naudodami klaviatūros „ Windows Key + R“ kombinaciją (vienu metu paspauskite šiuos klavišus. Naujai atidarytame laukelyje be kabučių įveskite „ services.msc “ ir spustelėkite Gerai, kad atidarytumėte „ Services“ įrankį.
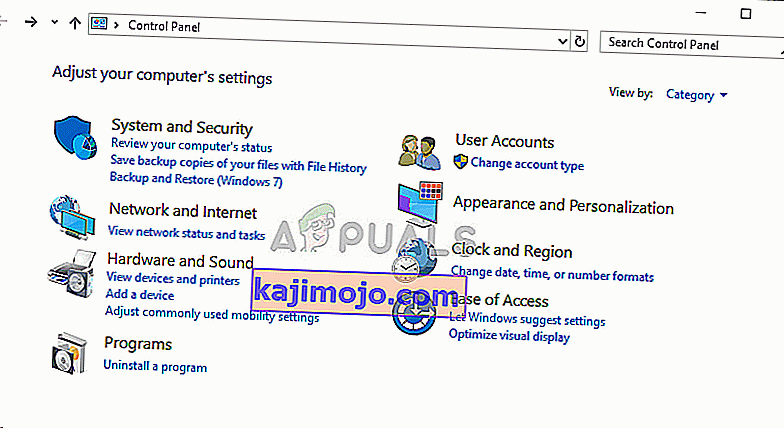
- Alternatyvus būdas yra atidaryti valdymo skydą jį suradus meniu Pradėti . Taip pat galite ieškoti naudodami meniu Pradėti paieškos mygtuką.
- Atsidarius Valdymo skydo langui, lango viršuje, dešinėje , pakeiskite parinktį „ Peržiūrėti pagal “ į „ Didelės piktogramos “ ir slinkite žemyn, kol rasite įrašą Administravimo įrankiai . Spustelėkite jį ir apačioje suraskite nuorodą „ Paslaugos“ . Spustelėkite jį, kad taip pat atidarytumėte.
- Sąraše suraskite kriptografines paslaugas ir DNS kliento paslaugas, dešiniuoju pelės mygtuku spustelėkite ant jų ir pasirodžiusiame kontekstiniame meniu pasirinkite Ypatybės .
- Jei paslauga yra paleista (galite tai patikrinti šalia paslaugos būsenos pranešimo), kol kas turėtumėte ją sustabdyti spustelėdami mygtuką „ Stop “ lango viduryje. Jei jis sustabdytas, palikite jį sustabdyti, kol tęsime.

- Prieš atlikdami kitus veiksmus, įsitikinkite, kad paslaugos ypatybių lango meniu „ Startup type“ parinktis nustatyta kaip „ Automatic“ . Patvirtinkite visus dialogo langus, kurie gali pasirodyti keičiant paleisties tipą. Spustelėkite Pradėti mygtuką viduryje lango prieš išeinant. Būtinai pakartokite tą patį procesą visoms mūsų paminėtoms paslaugoms.


Spustelėdami Pradėti galite gauti tokį klaidos pranešimą:
„Windows“ nepavyko paleisti paslaugos vietiniame kompiuteryje. Klaida 1079: šiai paslaugai nurodyta paskyra skiriasi nuo kitų paslaugų, vykdomų tame pačiame procese, paskyros.
Jei taip atsitiktų, vadovaukitės toliau pateiktomis instrukcijomis, kad ją išspręstumėte.
- Norėdami atidaryti paslaugos ypatybių langą, atlikite anksčiau nurodytų instrukcijų 1-3 veiksmus. Eikite į skirtuką Prisijungti ir spustelėkite mygtuką Naršyti ....
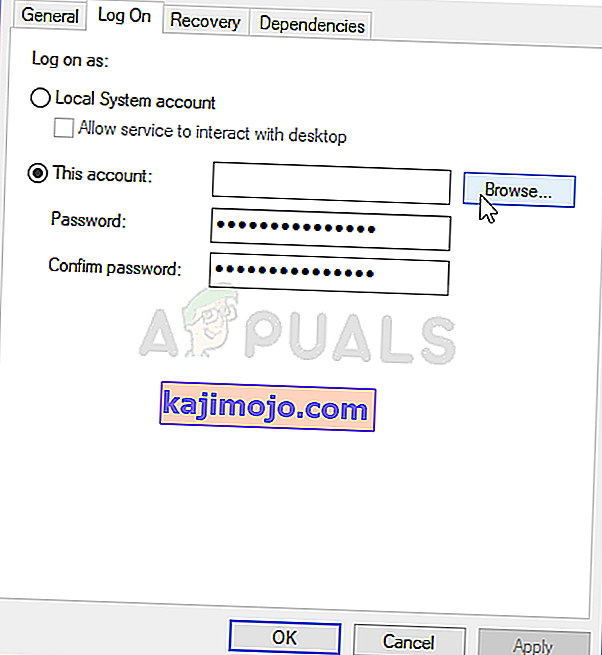
- Lauke „ Įveskite objekto pavadinimą pasirinkti “ įveskite tinklo tarnybą , spustelėkite Tikrinti vardus ir palaukite, kol vardas bus pasiekiamas.
- Baigę spustelėkite Gerai ir įveskite slaptažodį laukelyje Slaptažodis, kai būsite paraginti, jei nustatėte slaptažodį. „Windows 10“ failų bendrinimas dabar turėtų veikti tinkamai!

4 sprendimas: patikrinkite, ar nėra įtartinų plėtinių
Jei problema atsirado neseniai, tai gali būti dėl naujai pridėto plėtinio, kuris sukelia saugumo koncertą. Tai galite lengvai patikrinti atidarydami „Google Chrome“, po vieną išjungdami plėtinius ir patikrindami, kuris iš jų yra kaltininkas. Po to ištrinkite!
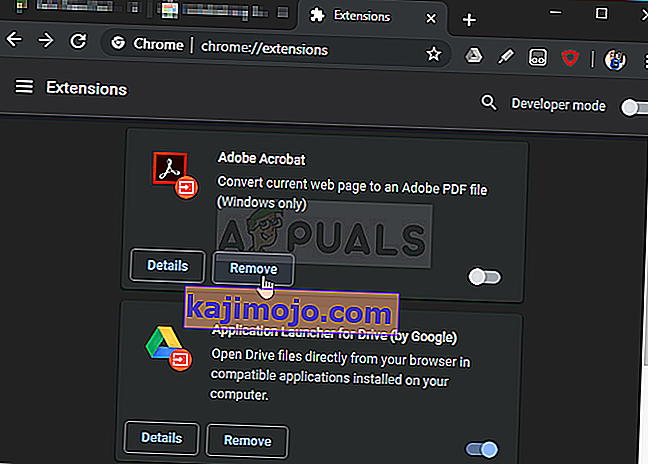
- Atidarykite „ Google Chrome “ dukart spustelėdami piktogramą darbalaukyje arba ieškodami jos meniu Pradėti. Įveskite žemiau esantį adresą adreso juostoje, kad atidarytumėte plėtinius :
chromas: // plėtiniai
- Pabandykite rasti plėtinį, kuris gali sukelti saugos problemų, arba neseniai pridėtą plėtinį ir spustelėkite šalia jo esantį mygtuką Pašalinti , kad visam laikui pašalintumėte jį iš „Google Chrome“.
- Iš naujo paleiskite „Google Chrome“ ir patikrinkite, ar vis dar pastebite, kad pranešimas „Užtikrinti saugų ryšį“ per ilgai pakimba jūsų kompiuteryje!

5 sprendimas: Išjunkite HTTP / prievado tikrinimą savo antivirusinėje
Įprasta problemos priežastis yra tai, kad antivirusinė programa be reikalo nuskaito svetainių sertifikatus, todėl sulėtėja failų prašymo iš serverių procesas, kuris iš tikrųjų gali sukelti „Saugaus ryšio nustatymo“ pranešimą ilgą laiką „Google Chrome“ .
Since the error appears to users using different antivirus tools, here is how to locate the HTTP or Port scanning options on some of the most popular third-party AV tools.
- Open the antivirus user interface by double-clicking on its icon at the system tray (right part of the taskbar at the bottom of the window) or by searching for it in the Start menu.
- The HTTPS scanning setting is located in different spots concerning different antivirus tools. It can often be found simply without much hassle but here are some quick guides on how to find it in the most popular antivirus tools:
Kaspersky Internet Security: Home >> Settings >> Additional >> Network >> Encrypted connections scanning >> Do not scan encrypted connections

AVG: Home >> Settings >> Components >> Online Shield >> Enable HTTPS Scanning (uncheck it)

Avast: Home >> Settings >> Components >> Web Shield >> Enable HTTPS Scanning (uncheck it)
ESET: Home >> Tools >> Advanced Setup >> Web and Email >> Enable SSL/TLS protocol filtering (turn it off)
Check to see if you are now able to visit any website without receiving the “Establishing a secure connection” message for a long time! If the error still appears, you might consider using a different antivirus or firewall tool, especially if the one giving you the problems is free!
Solution 6: Disable TLS 1.3
The problem is mostly related to some of the latest version of TLS. Certain developers have discovered that the problem can be resolved easily simply by editing certain advanced Chrome settings which will disable TLS 1.3. TLS is the transport layer protocol which handles encryption and data transfer. Try using an older version. Follow the instructions below to try this method out!
- Open Google Chrome by double-clicking its icon from the Desktop or by searching for it in the Start menu. Type in the address below in the address bar to open Experiments:
chrome://flags
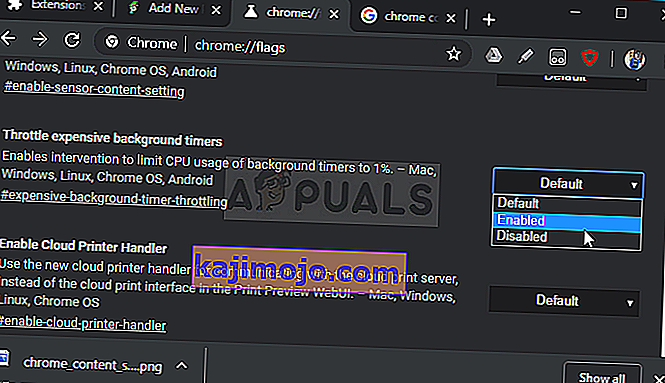
- Locate the option to disable TLS listed below inside the Experiments window, under the Available tab. You can use the search bar at the top of the window to locate it as the list is very long. Make sure you search for TLS, find the related settings, and set it to Disabled.
- Restart Google Chrome and check to see if establishing the connection is still a problem!

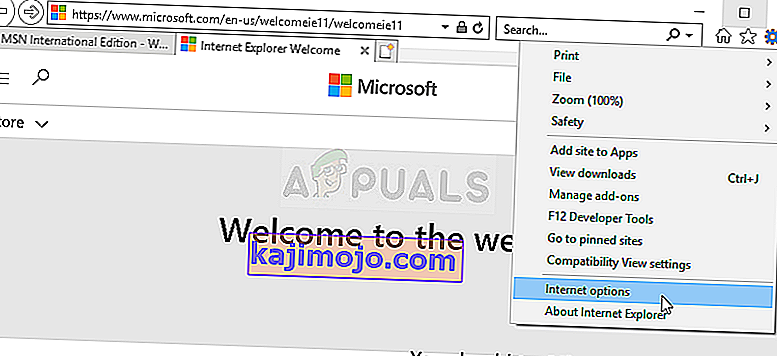
Solution 7: Make Sure Certain Settings are Set in Internet Options
This is one of the easiest methods used to resolve the problem. Proxy servers can cause the login process to fail and you need to disable them inside Internet Options. Make sure you try out the methods above before troubleshooting this problem!
- Open Internet Explorer on your computer by searching for it on the Desktop or the Start menu. Click on the cog icon located in the top right corner. From the menu which opens, click on Internet Options to open a list on related connection settings.
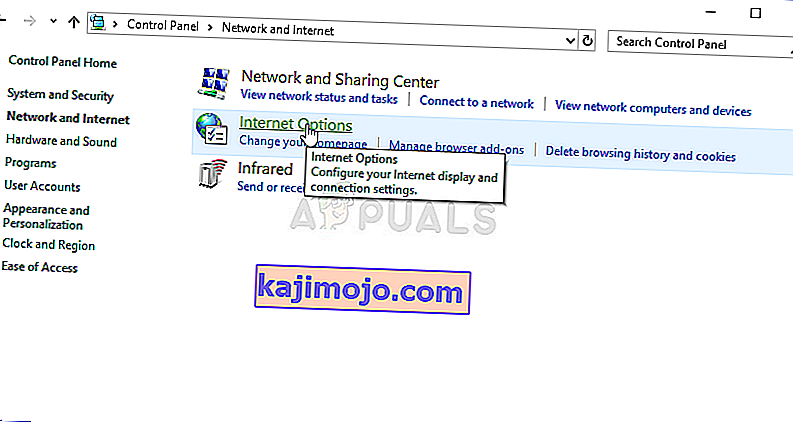
- If you don’t have access to Internet Explorer, Open Control Panel by searching for it in the Start menu or by using the Windows Key + R key combination, typing “control.exe” in the Run box, and click OK to run Control Panel.
- In Control Panel, select to View as: Category at the top right corner and click on the Network and Internet button to open this section. Inside this window, click on Internet Options to navigate to the same screen as you would if you opened Internet Explorer.
- Navigate to the Connections tab and click on LAN Settings. Uncheck the box next to Automatically Detect Settings and make sure the Use a proxy server for your LAN option is unchecked.
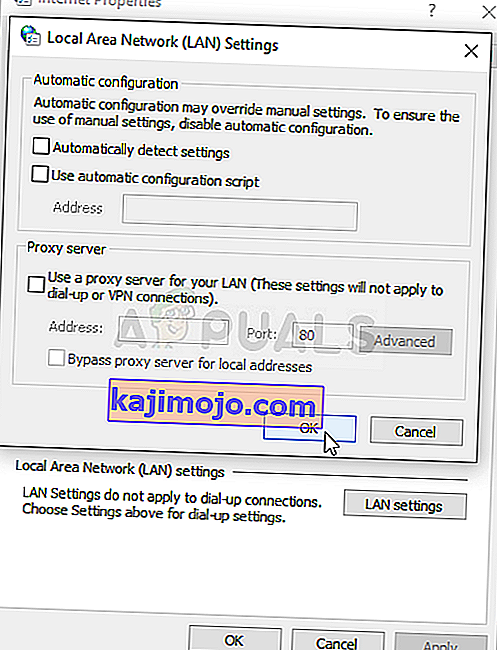
- Make sure you apply the changes you made and restart your computer before you check to see if the Origin won’t go online login error still appears.


Solution 8: Clear Browsing Data
An over-accumulation of browsing data in the form of cookies, browser cache, and history files can slow down a browser’s ability to connect and cause it to use more internet resources than necessary. This can be observed when trying to connect to a secure website. Users have reported that deleting their browsing data was able to help them get rid of the problem!
Make sure you follow the steps from the Solution 3 of our How to Fix Google Chrome High CPU Usage on Windows? article. Restart your computer again and check if the “Establishing secure connection” message keeps appearing!
Solution 9: Group Policy Fix
This is quite an easy way of resolving the problem but, unfortunately, it’s not available to Windows 10 Home users. If you are using Windows 10 Pro or Enterprise, make sure you follow the steps below to try to resolve this problem!
- Use the Windows Key + R key combination (tap the keys simultaneously) to open the Run dialog box. Enter “gpedit.msc” in the Run dialog box, and press the OK button to open the Local Group Policy Editor tool. On Windows 10, you can try simply type Group Policy Editor in the Start menu and click the top result.

- On the left navigation pane of Local Group Policy Editor, under Computer Configuration, double click on Windows Settings, and navigate to Security Settings >> Public Key Policies.
- Select the Public Key Policies folder by left-clicking on it and check out its right side section.
- Double click on the “Certificate Path Validation Settings” policy and check the radio button next to the “Define Policy Settings” option. Uncheck the box next to the Allow user trusted root CAs to be used to validate certificates (recommended) option.
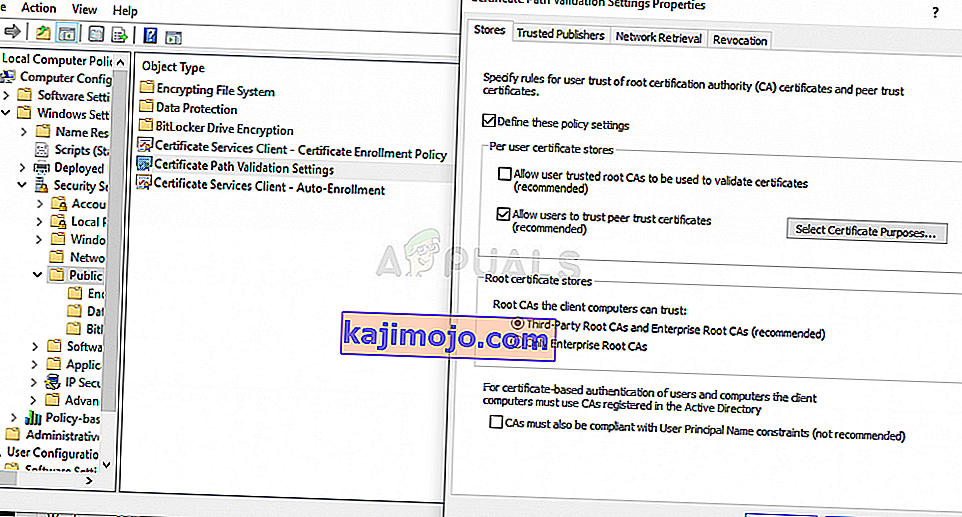
- Apply the changes you have made before exiting. The changes won’t be applied until you restart.
- Finally, reboot the computer to save the changes and check to see if you are still being targeted with the error.

