Kai kurie „Windows“ vartotojai negali ieškoti ir atsisiųsti naujų savo OS naujinimų. Labiausiai paveikti vartotojai praneša, kad atnaujinimai pradedami atsisiųsti, tačiau procesas tiesiog niekada nesibaigia ir rodomas klaidos kodas 8024A000 . Pagal klaidos kodą ši klaida įvyksta, kai „Windows“ naujinimas bando užkirsti kelią naujinimo sesijos nutraukimui, kol ji atlieka svarbią užduotį. Problema nėra išskirtinė tam tikrai „Windows“ versijai, nes pranešama, kad ji atsiranda „Windows 10“, „Windows 8.1“ ir „Windows 7“.

Kas sukelia „Windows“ naujinimo klaidos kodą 8024A000?
Mes ištyrėme šią problemą, peržiūrėdami įvairias vartotojų ataskaitas ir išanalizavę keletą populiariausių šio klaidos kodo pataisymų. Pasirodo, yra keletas skirtingų galimų kaltininkų, kurie gali sukelti šią problemą:
- „Windows Update“ triktis - ši problema gali kilti dėl pasikartojančios WU problemos. Tam tikromis aplinkybėmis atnaujinimo komponentas užstrigs ir negalės įdiegti naujo laukiančio naujinimo. Tokiu atveju „Windows Update“ trikčių šalinimo įrankis turėtų sugebėti išspręsti problemą automatiškai, pritaikęs taikomas remonto strategijas.
- „Windows“ naujinimo paslauga yra įstrigusi silpnos būklės - kaip paaiškėja, ši problema taip pat gali kilti, jei viena ar daugiau „Windows“ paslaugų nėra nei paleistos, nei sustabdytos. Jei šis scenarijus yra tinkamas, turėtumėte sugebėti išspręsti problemą naudodami padidintą CMD raginimą sustabdyti ir priverstinai paleisti kiekvieną susijusią paslaugą.
- Su WU susieti DLL nėra tinkamai užregistruoti - „Windows Update“ ieškodama ir diegdama laukiančius naujinimus remiasi dešimtimis „Dynamic Link Library“ failų. Tokiu atveju turėtumėte sugebėti išspręsti problemą perregistruodami susijusius DLL failus iš padidinto komandų eilutės lango.
- Sistemos failo sugadinimas - sistemos failo sugadinimas taip pat gali būti atsakingas už šį klaidos pranešimą. Kai tik vienas sugadintas failas gali veiksmingai sulaužyti visą WU komponentą. Jei šis scenarijus yra tinkamas, turėtumėte sugebėti išspręsti problemą naudodami sistemos failų tikrinimo priemonę arba DISM sugadintiems failams taisyti.
- RST tvarkyklės trūksta diegiant „Windows“ - ši konkreti problema taip pat gali kilti, jei jūsų kompiuteryje trūksta „Rapid Storage Technology“ tvarkyklės arba ji naudoja labai pasenusią versiją. Pranešama, kad keliems paveiktiems vartotojams pavyko išspręsti problemą įdiegus naujausią RST tvarkyklės versiją.
- Trečiosios šalies AV uždaro „Windows Update“ naudojamus prievadus. Pasirodo, kad kai kurie trečiųjų šalių AV įrankiai yra tiek pernelyg apsaugoti, kad turi tendenciją uždaryti teisėtus „Windows Update“ naudojamus prievadus. „McAfee Total Protection“, „AVAST“ ir „Comodo“ yra šio sąrašo viršuje, tačiau gali būti ir kitų. Tokiu atveju turėtumėte sugebėti išspręsti problemą pašalindami trečiosios šalies rinkinį ir naudodami įmontuotą sprendimą („Windows Defender“).
Jei šiuo metu stengiatės išspręsti šį klaidos pranešimą, šis straipsnis turėtų nukreipti jus teisinga linkme. Žemiau rasite keletą galimų pataisymų, kuriuos kiti panašios situacijos vartotojai sėkmingai panaudojo šiai problemai išspręsti.
Norėdami išlikti kuo efektyvesniu, patariame vadovautis toliau pateikiamais metodais jų pateikimo tvarka ir atmesti tuos veiksmus, kurie netinka jūsų scenarijui. Galų gale turėtumėte rasti pataisymą, kuris išspręs problemą jūsų konkrečiu atveju, neatsižvelgiant į kaltininką, kuris tai sukelia.
1 metodas: paleiskite „Windows Update“ trikčių šalinimo įrankį
Jei susiduriate su šia problema, pirmiausia turėtumėte paleisti „Windows Update“ trikčių šalinimo įrankį. Keli paveikti asmenys sugebėjo išspręsti problemą, priversdami „Windows“ naujinimo trikčių šalinimo įrankį automatiškai išspręsti klaidos kodą 8024A000.
Keli paveikti vartotojai pranešė, kad problema buvo išspręsta paleidus „Windows Update“ trikčių šalinimo įrankį ir iš naujo paleidus kompiuterį. Gali būti, kad jūsų „Windows“ versijoje yra šios konkrečios klaidos taisymo strategija. Jei taip, trikčių šalinimo įrankis automatiškai pritaikys taisymo strategiją ir galėsite išspręsti problemą vos keliais paspaudimais.
Čia yra trumpas „Windows“ naujinimo trikčių šalinimo įrankio vykdymo vadovas:
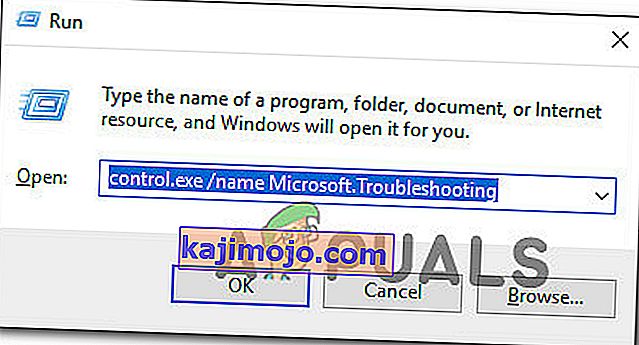
- Paspauskite „ Windows“ klavišą + R, kad atidarytumėte Vykdyti dialogo langą. Tada teksto laukelyje įveskite „ control.exe / name Microsoft.Troubleshooting “ ir paspauskite Enter, kad atidarytumėte Nustatymų programos skirtuką Trikčių šalinimas .
- Įėję į skirtuką Trikčių šalinimas, slinkite žemyn į skirtuką Kelkis ir veikia ir spustelėkite „ Windows Update“ . Tada naujai pasirodžiusiame meniu spustelėkite Vykdyti trikčių šalinimo įrankį .
- Palaukite, kol pradinis nuskaitymas bus baigtas, tada spustelėkite Taikyti šią pataisą, jei randama perspektyvi taisymo strategija.
- Jei pataisymas įdiegtas, iš naujo paleiskite kompiuterį ir patikrinkite, ar problema išspręsta, kai bus baigta kita paleisties seka.

Jei bandant įdiegti „Windows“ naujinimą vis dar pasitaiko tas pats klaidos kodas 8024A000 , pereikite prie kito toliau pateikto metodo.
2 metodas: iš naujo paleiskite „Windows Update“ paslaugas
Pasirodo, ši konkreti problema taip pat gali kilti dėl „Windows“ naujinimo paslaugos, kuri įstringa silpnoje būsenoje (ji nėra nei paleista, nei sustabdyta). Keli paveikti vartotojai pranešė, kad jie sugebėjo išspręsti šią problemą iš naujo paleidę kiekvieną WU („Windows Update“) komponento naudojamą paslaugą.
Patvirtinta, kad ši procedūra veiksminga visose naujausiose „Windows“ versijose („Windows 7.1“, „Windows 8.1“ ir „Windows 10“)
Čia yra trumpas vadovas, kaip tai padaryti:
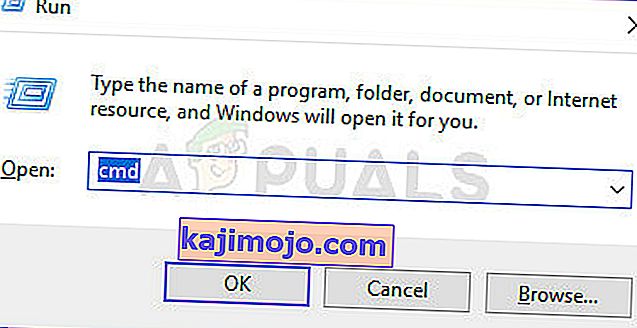
- Paspauskite „ Windows“ klavišą + R, kad atidarytumėte dialogo langą Vykdyti . Kitame ekrane teksto laukelyje įveskite „cmd“ ir paspauskite Ctrl + Shift + Enter, kad atidarytumėte padidintą komandų eilutę. Kai paprašys UAC (vartotojo abonemento kontrolė) , spustelėkite Taip, kad suteiktumėte administravimo teises.
- Kai būsite pakelto CMD eilutėje, įveskite šias komandas eilės tvarka ir paspauskite Enter po kiekvienos, kad paleistumėte iš naujo kiekvieną „Windows“ naujinimo paslaugą:
grynasis stop wuauserv grynasis stop bitas grynasis stop kriptovc
- Kai labai WU paslauga bus sustabdyta, įveskite šias komandas ir po kiekvienos paspauskite Enter, kad iš naujo paleistumėte paslaugas:
net start wuauserv neto pradžios bitai net start cryptsvc exit
- Kai procedūra bus baigta, paleiskite kitą kompiuterį iš naujo ir patikrinkite, ar problema išspręsta.

Jei bandant įdiegti laukiantį „Windows“ naujinimą vis dar pasitaiko tas pats klaidos kodas 8024A000 , pereikite prie kito toliau pateikto metodo.
3 metodas: perregistruokite DLL, susijusius su „Windows Update“
Pasirodo, taip pat gali būti, kad pastovių 8024A000 klaidų kodų priežastis yra DLL („Dynamic Link Library“) failas, kuris nebėra tinkamai užregistruotas. Paprastai tai pranešama senesnėje „Windows“ versijoje ir dažniausiai įvyksta dėl sugadinimo arba po to, kai saugos skaitytuvas dėl virusinės infekcijos kai kuriuos elementus karantinuoja.
Jei šis scenarijus tinka jūsų dabartinei situacijai, čia yra trumpas vadovas, kaip galite perregistruoti DLL, susijusius su WU („Windows Update“), kad išspręstumėte 8024A000 klaidų kodus:
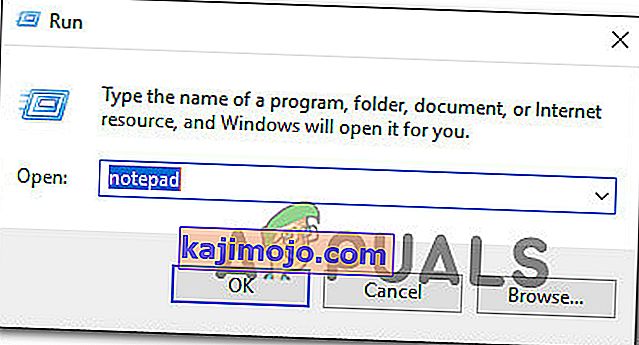
- Paspauskite „ Windows“ klavišą + R, kad atidarytumėte dialogo langą Vykdyti . Tada teksto laukelyje įveskite „notepad“ ir paspauskite Ctrl + Shift + Enter, kad atidarytumėte „Notepad“ langą su padidinta prieiga. Kai paprašys UAC (vartotojo abonemento kontrolė)
- Naujajame „Notepad“ dokumente įklijuokite šias komandas:
regsvr32 c:\windows\system32\vbscript.dll /s regsvr32 c:\windows\system32\mshtml.dll /s regsvr32 c:\windows\system32\msjava.dll /s regsvr32 c:\windows\system32\jscript.dll /s regsvr32 c:\windows\system32\msxml.dll /s regsvr32 c:\windows\system32\actxprxy.dll /s regsvr32 c:\windows\system32\shdocvw.dll /s regsvr32 wuapi.dll /s regsvr32 wuaueng1.dll /s regsvr32 wuaueng.dll /s regsvr32 wucltui.dll /s regsvr32 wups2.dll /s regsvr32 wups.dll /s regsvr32 wuweb.dll /s regsvr32 Softpub.dll /s regsvr32 Mssip32.dll /s regsvr32 Initpki.dll /s regsvr32 softpub.dll /s regsvr32 wintrust.dll /s regsvr32 initpki.dll /s regsvr32 dssenh.dll /s regsvr32 rsaenh.dll /s regsvr32 gpkcsp.dll /s regsvr32 sccbase.dll /s regsvr32 slbcsp.dll /s regsvr32 cryptdlg.dll /s regsvr32 Urlmon.dll /s regsvr32 Shdocvw.dll /s regsvr32 Msjava.dll /s regsvr32 Actxprxy.dll /s regsvr32 Oleaut32.dll /s regsvr32 Mshtml.dll /s regsvr32 msxml.dll /s regsvr32 msxml2.dll /s regsvr32 msxml3.dll /s regsvr32 Browseui.dll /s regsvr32 shell32.dll /s regsvr32 wuapi.dll /s regsvr32 wuaueng.dll /s regsvr32 wuaueng1.dll /s regsvr32 wucltui.dll /s regsvr32 wups.dll /s regsvr32 wuweb.dll /s regsvr32 jscript.dll /s regsvr32 atl.dll /s regsvr32 Mssip32.dll /s
- Once you pasted the commands, go to File (from the ribbon menu at the top) and click on SaveAs.
- From the Save As window, name the file whatever you want but make sure to set the extension of the File Name to .bat. We saved it WindowsUpdateRegister.bat. Then, select a convenable location and click on Save.
- Double-click on the newly created BAT file and click Yes at the confirmation prompt. If you’re also prompted by the UAC (User Account Control) click Yes to grant admin access.
- Once the DLL files have been re-registered, restart your computer and see if the issue has been resolved once the next startup sequence is complete.


If the 8024A000 issue is still occurring, move down to the next method below.
Method 4: Performing SFC and DISM Scans
This particular issue can also occur due to some degree of system file corruption. Although the issue is less common on Windows 10, it’s still possible to get this error code due to some corrupted system file even if you’re system is up to date.
Both DISM (Deployment Image Servicing and Management) and SFC (System File Checker) are built-in utilities capable of repairing system files. The only difference is they do it in different ways.
While SFC scans and repairs system files by replacing corrupted files with locally stored copies, DISM relies on Windows Update to fix corruption. That’s why it’s important to start this procedure with the SFC scan – if WU has a corruption problem, the System File Checker should resolve it, allowing you to use DISM effectively.
Here’s a quick guide on running an SFC and DISM scan from an elevated Command Prompt:
- Press Windows key + R to open up a Run dialog box. Then, type “cmd” inside the text box and press Ctrl + Shift + Enter to open up an elevated Command Prompt. When you’re prompted by the UAC (User Account Control), click on Yes to grant administrative privileges.
- Once you’re inside the elevated Command Prompt, type the following command and press Enter immediately to start the SFC scan:
sfc /scannow
Note: Keep in mind that once you start this process, there’s no way to stop it without running the risk of producing even more disk errors. Be patient and don’t close the CMD window or attempt to restart your computer.
- When the procedure is complete, you can safely close the elevated command prompt and restart your computer to see if the issue has been resolved at the next system startup.
- If the same issue is still occurring even after you’ve performed the SFC scan, follow step 1 again to open another elevated Command Prompt. Then, type the following command and press Enter to perform a DISM scan:
DISM /Online /Cleanup-Image /RestoreHealth
Note: DISM requires a stable Internet connection in order to be able to download fresh copies of the files that are affected by corruption.
- Once the scan is finished, perform one final restart and check if the issue has been resolved once the next startup sequence is complete.
Method 5: Instaling the Intel Rapid Storage Technology Driver (if applicable)
Another possible culprit that might end up causing the 8024A000 error code is a missing our updated Intel Rapid Storage Technology Driver. Several affected users have reported that the issue was no longer occurring after they installed the latest version of this driver and restarted their computer.
Based on our investigations, this scenario is mostly reported to occur in instances where the user is encountering the issue on Windows 7 or below. If this is applicable, follow the steps below to install the latest driver of Intel Rapid Storage:
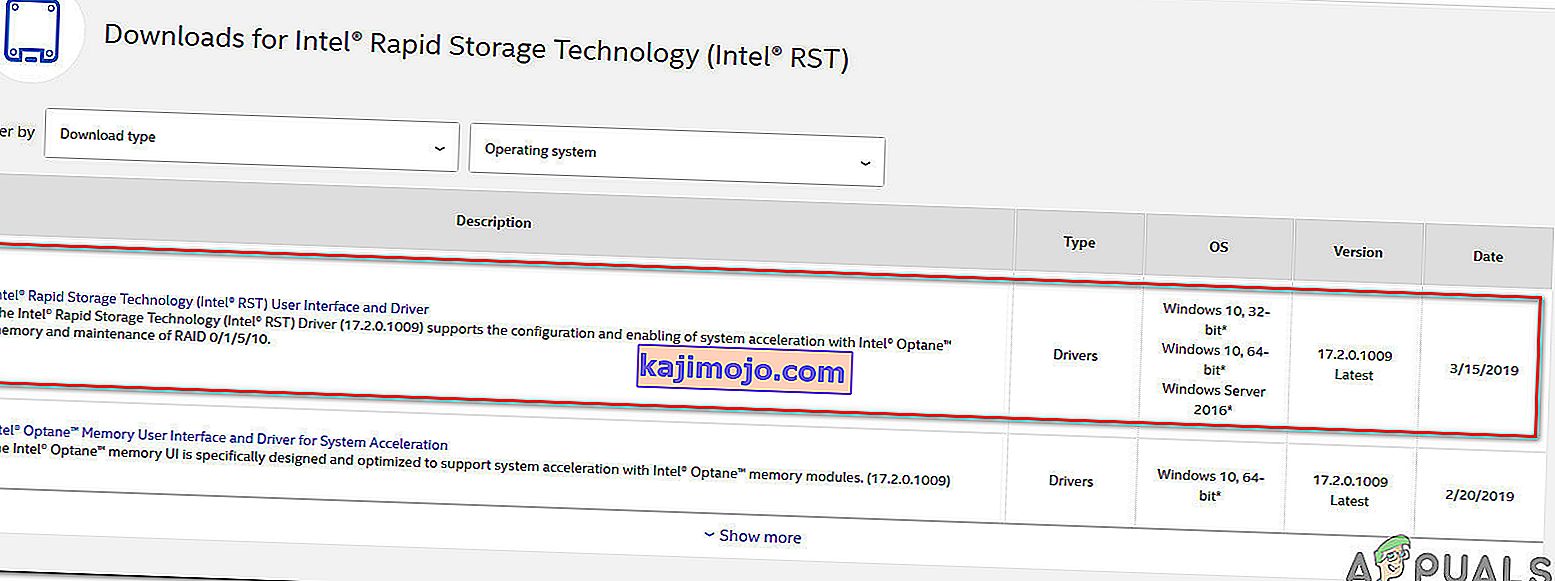
- Visit this link (here) and click on Intel Rapid Storage Technology *RST) User Interface and Driver to initiate the download.
- Once the download is complete, open the installation executable and follow the on-screen prompts to complete the installation of the latest RST driver.
- Restart your computer once the driver is installed and see if the issue has been resolved once the next startup sequence is complete.

If you’re still encountering the 8024A000 Error Code, move down to the next method below.
Method 6: Uninstalling 3rd party AV
As it turns out, it’s also possible that the issue is actually being caused by an overprotective 3rd party AV suite. Several affected users have reported that the issue was resolved after they uninstalled the 3rd party security scanner and reverted back to the default AV (Windows Defender).
McAfee Total Protection, AVAST, and Comodo are commonly reported as being responsible for causing the 8024a000. Users are speculating that the issue occurs because the AV ends up blocking some ports that are actually being used by the WU component.
UPDATE: Based on several user reports, this issue can also be caused by the premium version of Malwarebytes. If you’re using a premium subscription for Malwarebytes, you should be able to resolve the issue by disabling Ransomware protection from the Settings menu.
If you’re suspecting that your third-party AV/firewall is causing the issue, follow the steps on this article (here) to completely uninstall your AV suite without leaving any remnant files.
If this scenario is not applicable or the issue is still occurring even after you’ve uninstalled your 3rd party AV suite, move down to the next method below.
Method 7: Performing a repair install
If none of the methods above have helped you to resolve the issue, a repair install should end up repairing the Windows Update problems. This procedure will reset all Windows components, including booting-related processes.
However, it does things a bit more efficiently than a classic clean install in the sense that it allows you to keep all personal data including photos, videos, applications, and games). The only thing that will get deleted and replace are all Windows components – which is exactly what you need.
In case you want to go for a repair install, you can follow the instructions on this article (here) for step by step instructions on how to do this efficiently.